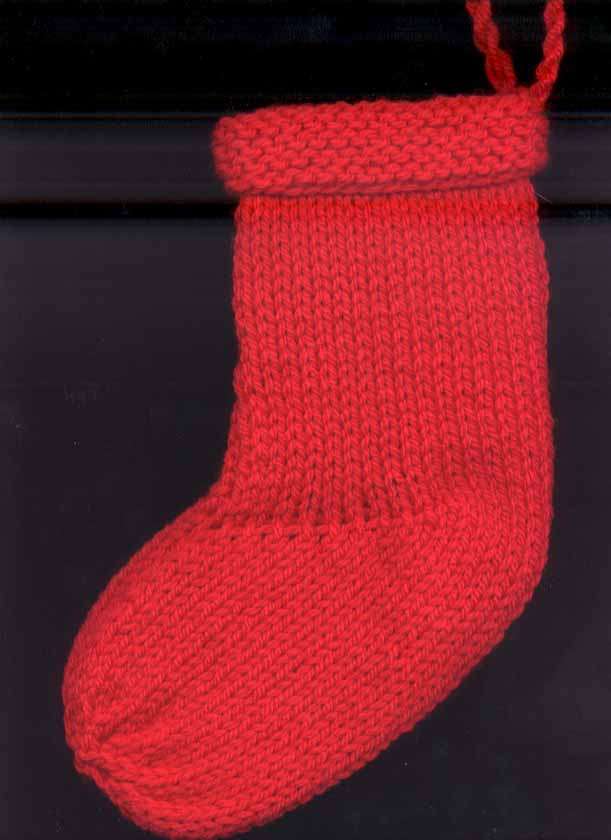
|
 One 50gr ball worsted weight acrylic
or washable wool blend One 50gr ball worsted weight acrylic
or washable wool blend
in red, green or white yarn
Size US 9 [5.5mm] needles or size to get gauge
Short Rows tutorial
Gauge: 8sts and 10 rows to 2
inches [not essential][don't you just love that?]
Skill Level:
Advanced Beginner
Difficulty Rating: Easy
Techniques:
Stockinette Stitch = Knit one row, Purl one row
Garter Stitch = Knit all rows
Short Rows = See Tutorial
|
|
Cast on 34 sts.
Knit 6 rows [a 2x2 rib could also be used] And if you use white, it will look furry.
Starting with a right side row work 30 rows in SS
We'll be starting short rows:
Next row: K24 turn,
Next row: P15 turn,
Continue in Stockinette Stitch working one extra
stitch on every row [before you turn] until all the sts have been worked - [i.e. K16
turn, P17 turn etc.] ending on a knit row.Purl
one row on the 34sts. Then you can start the next stocking stitch part on the right
side. The number of rows is not that essential and can be changed if so desired.
Knit 12 rows straight in Stockinette Stitch
Shape top:
Next row: *K1, K2tog, repeat from * to last st. K1.
Next row: P1, *P2tog, repeat from * to end of row
Next row: k2tog to end. [6sts]****
Next row: p2tog to end [3sts]
Note:****at this stage the yarn could be cut and drawn through the 6 sts to make a
'stubbier' toe. It's a matter of choice.
Cut yarn and draw through remaining sts and fasten off.
Sew seam.
Turn over garter st cuff.
Make a cord for hanging and fasten to top of cuff.
Hang on doorknob, fill with favours for guests to enjoy!
Note2…The top 6 rows of garter st could be
knit in white yarn [or a white fluffy yarn] to give it a real Christmasy feel. Or you can
crochet a loopy
stitch around the cuff.
Another idea is to decorate your stocking with
fun embellishments. Here's a stocking by Nicky Epstein that has a few fun things to knit. Stocking
embellishments...
The stocking is
approximately 11½" long from toe to the top of the cuff...when you fold the cuff
over, it's about 10½" long. You can adjust the length by knitting fewer rows along
the leg and foot for a smaller stocking. You can also start with fewer stitches if
you want it even smaller.
Enjoy the project.
|