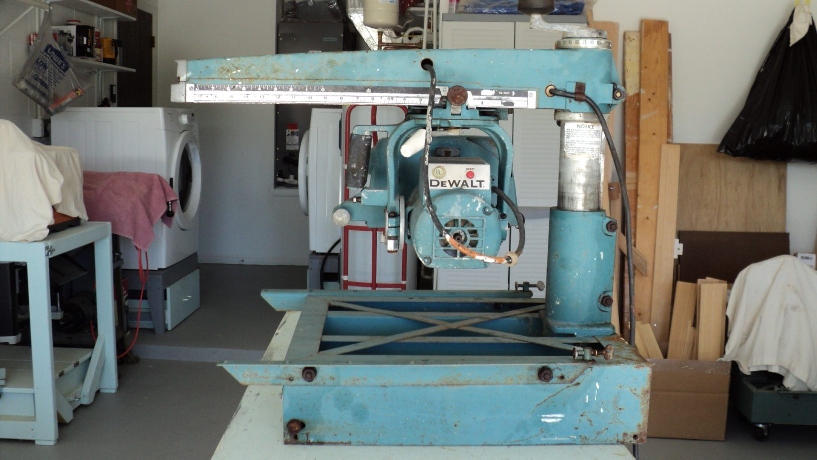
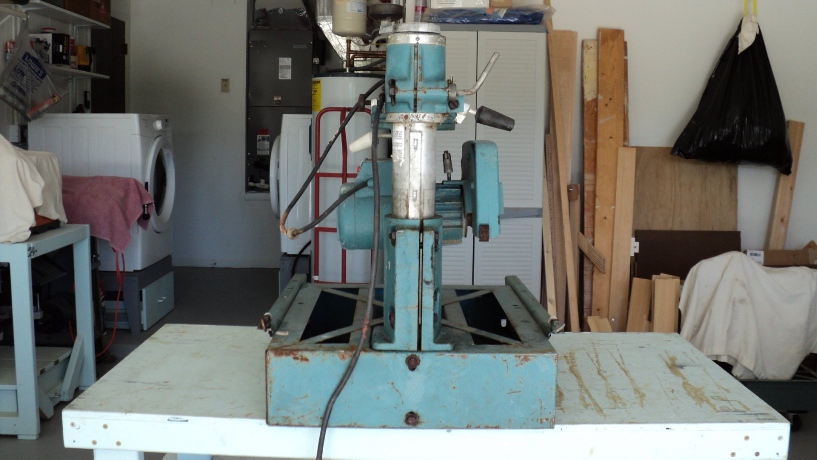
This page will describe the restoration of two DeWalt radial arm saws, a model 1250 and a model 1400. The 1250 (1966 vintage) was purchased for $50 and was well- kept by the original owner, I am the 3rd such thus far. The 1400 (1963 vintage) was purchased for $100 and it is unknown how many prior owners it had, but it was in need of a total disassembly and restoration as it was poorly kept, badly deteriorated and thus is the major focus of this document.
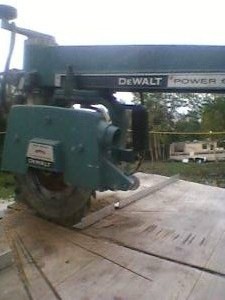
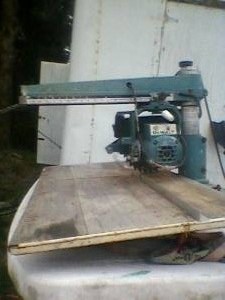
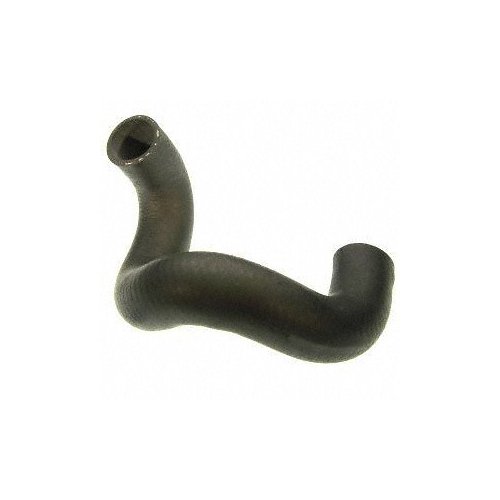
Above, Craigslist images of the 1400.
Missing index knobs and miter clamp handle. Every moving part had grit contamination due to outdoor exposure. I think it was kept in a sand pit.
Hot wired to run on plug- in, I can't think of a more dangerous way to use any tool. I'm surprised I wasn't buying this from a widow.
Power feed- through insulation bushings shot as well as the power cord itself.
No wrenches, exhaust nozzle, or anti- kickback pawl.
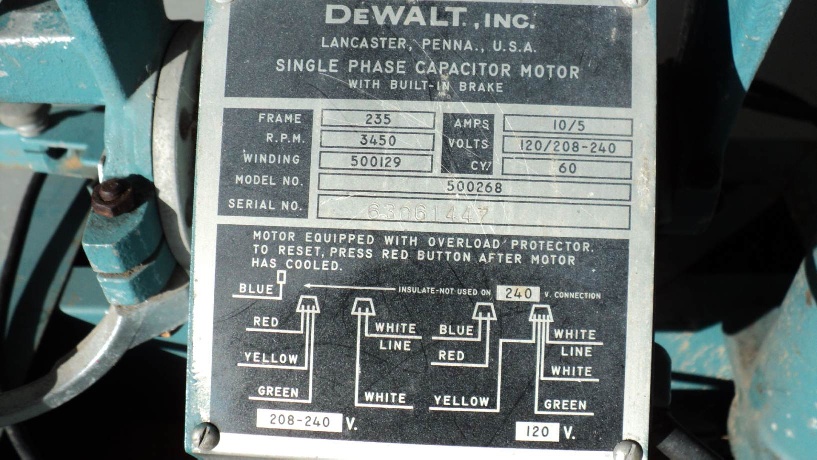
A working frame 235 motor made this mess worth the the effort to restore.
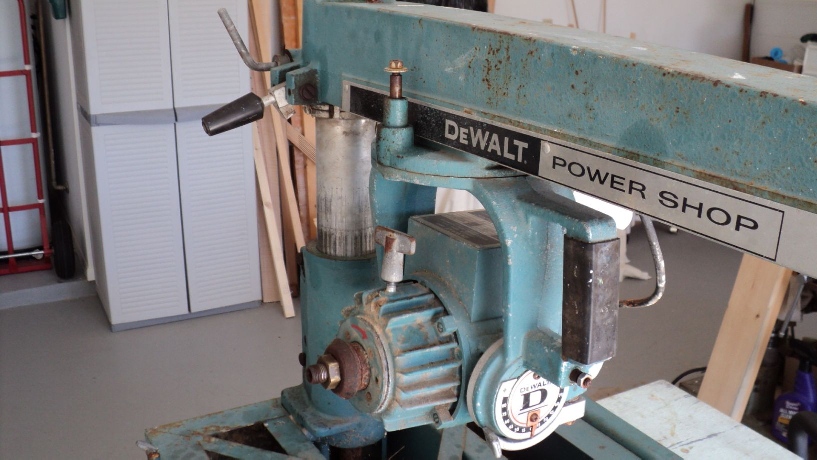
All painted surfaces were nylon and wire brushed with T.S.P. as needed before painting. Valspar gloss "Tropical Oasis" was used followed by a Krylon semigloss overcoat to knock down the brightness of the gloss paint, it looking too "plastic".

Wanting to keep all original fasteners, they were wire brushed and pickled in distilled vinegar which removed all rust.
.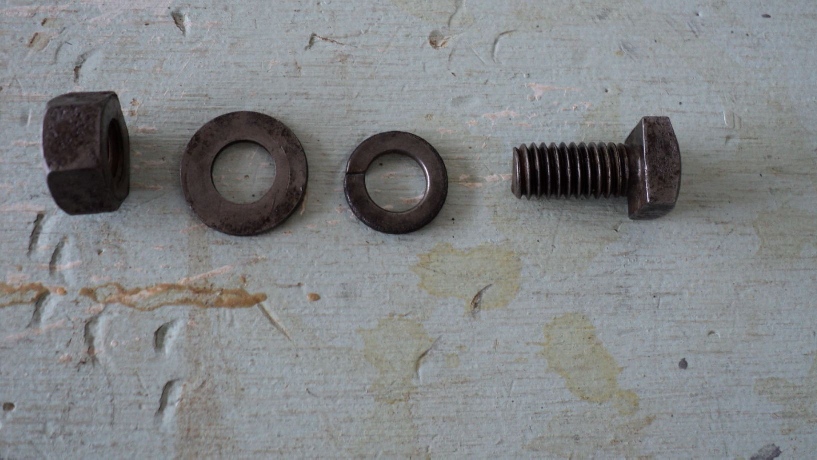
Then a final coat of Boiled Linseed Oil was lightly applied as a preservative. Items that were black oxide were touched up with a "Sharpie" pen, to good effect.
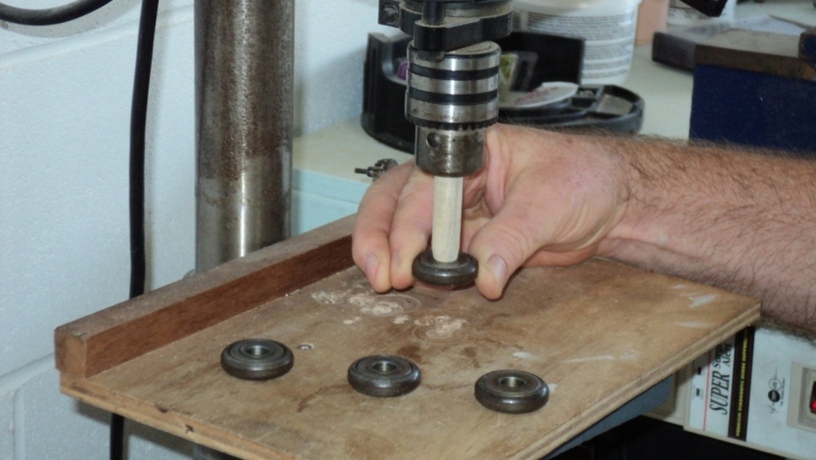
The 1400's yoke carriage to arm bearings also needed flushing and re lubrication. A video on how that was done was shot and uploaded to Youtube. Note that these bearings operate as way guides thus did not need a high- speed type of reworking, they simply interface between the arm and carriage components.
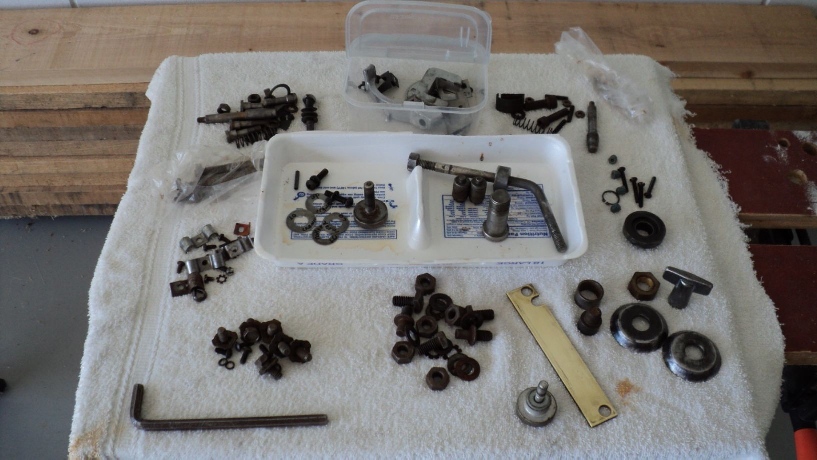
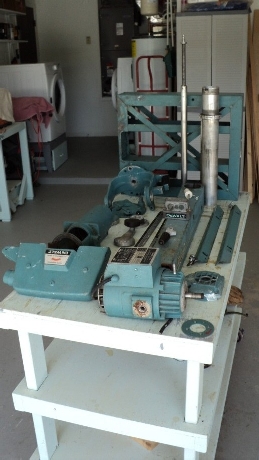
Order of part location was kept throughout the whole process so reassembly went very swift.
During assembly of the carriage yoke it was noticed that the tension varied and the locking lever would not maintain a consistent position. Inspection revealed that the locator tab inside the yoke adjust plate was sheared off thus making the plate unusable. A replacement plate was needed, so a shop made substitute was fabricated.
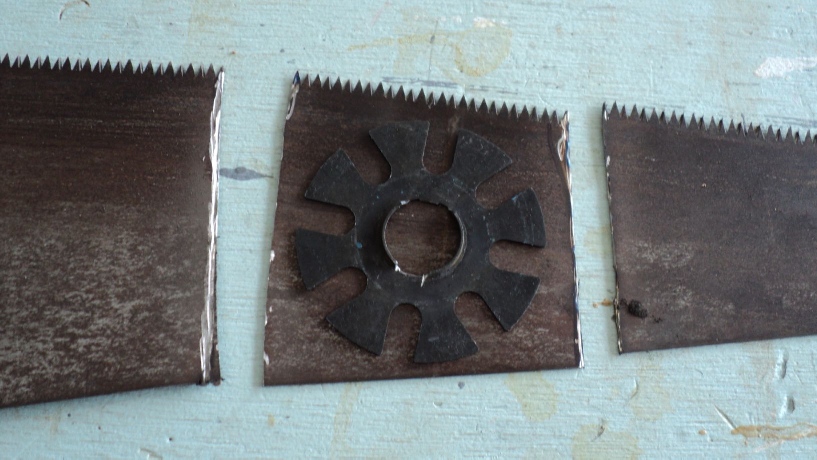
An old handsaw provided the perfect metal source with correct thickness and temper.
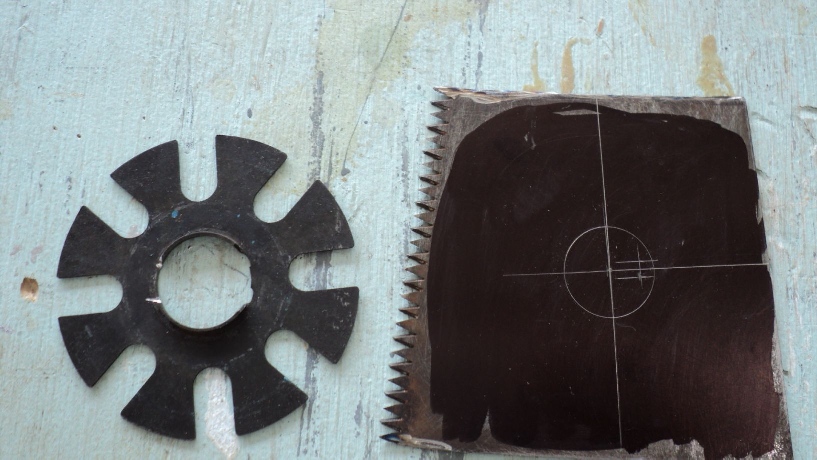
I darkened the blade with a Sharpie and transferred the dimensions of the yoke plate- note the 1/8" long pin layout, inner circle. This tiny projection is vital, without it there is no workaround to achieve the same effect, the king bolt will forever randomly rotate.
Dremel and hand filed and fitted, the final operation was to locate and cut the slot for the locking upset on the carriage yoke's bottom, this would ensure the clamp handle will be in the proper position after assembly.
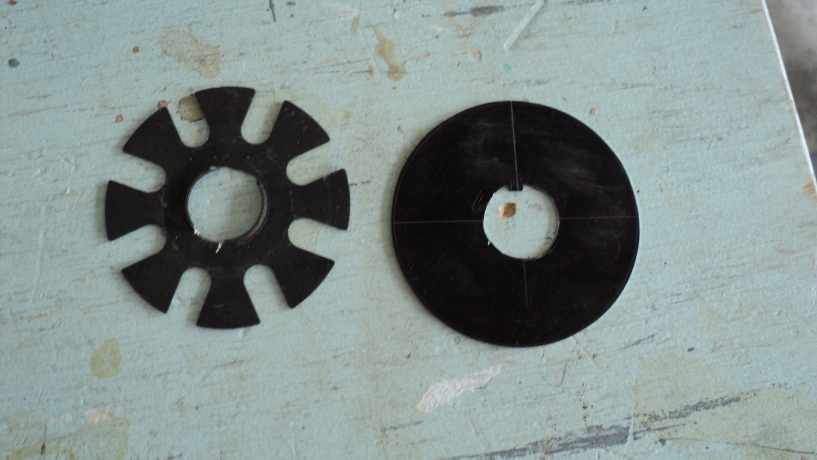
Success, the yoke locks firmly in place every time. There is a shim washer between the yoke nut and plate which acts as a friction break to minimize the stress on the 1/8" tab.
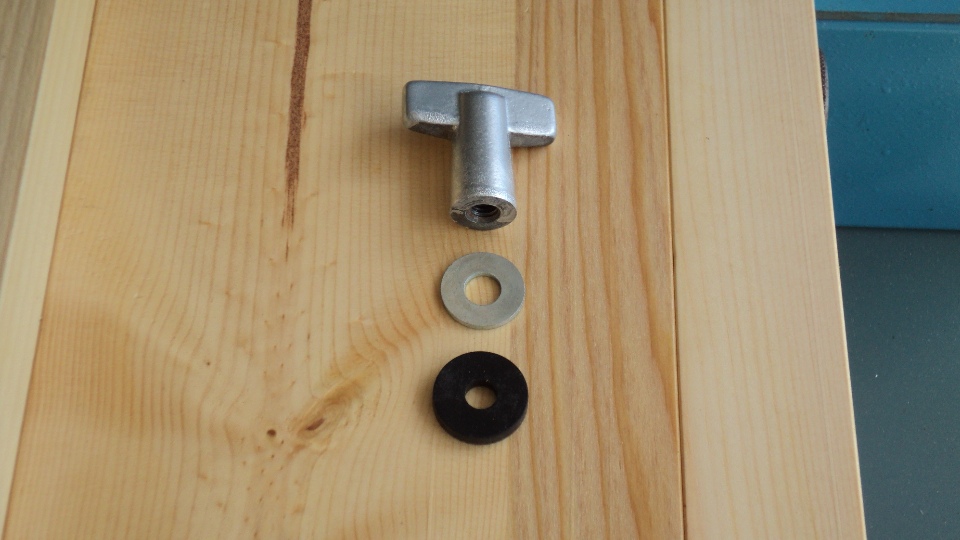
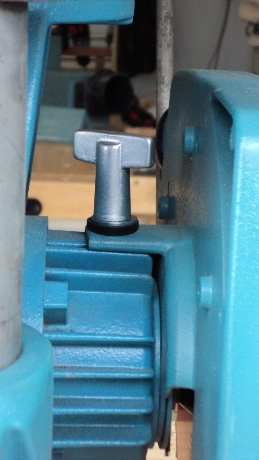
Some shop made parts were the index knobs, exhaust elbow, and arm insulation feed- through bushings.
I had bought a couple of thrift store pot lids and used their pulls as a temporary fix until I got the tulip ones, but I rather like them now so they stay.
A new exhaust elbow was needed, it was suggested on the Delphi DeWalt Radial Arm Saw forum that a Gates 22006 Lower Radiator Hose would yield material for at least two at 90 degrees, so an Amazon order was placed and a section cutout that neatly fit the 1-1/2" male nozzle of the blade guard.
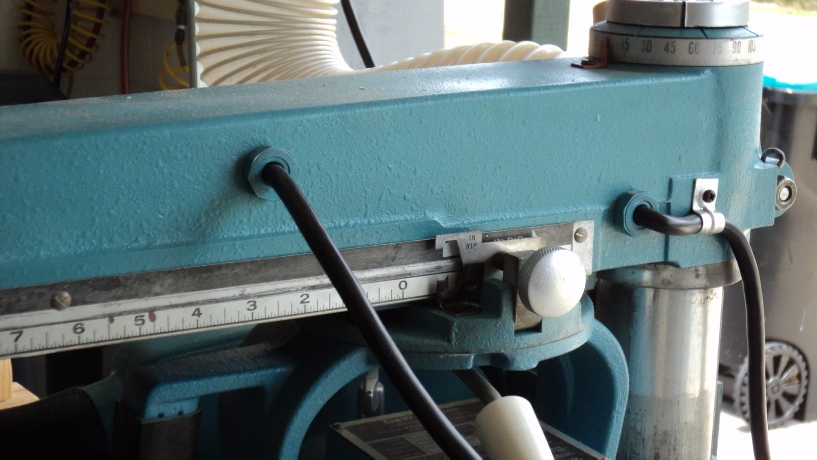
The feedthrough bushings were modified pvc plumbing reducer adapters. I drilled out the i.d. to a 3/8" slip fit for the cord, and turned down the o.d. on the drill press using a carriage bolt as a mandrel and a block of wood as the tool rest. Holding a chisel on the vertical, I used the setup like a pen turners rig, and it worked exceptionally well, one pressed fit and the other just a dab of adhesive to secure to the casting. Clamps inside the arm do the actual strain relief duty, these just prevent wire chafe.
Combining a rubber washer backed by a steel flat one makes a marked improvement to the blade guard t- nut. It maintains clamping pressure and also subdues harmonics that reverberate about the guard shell.
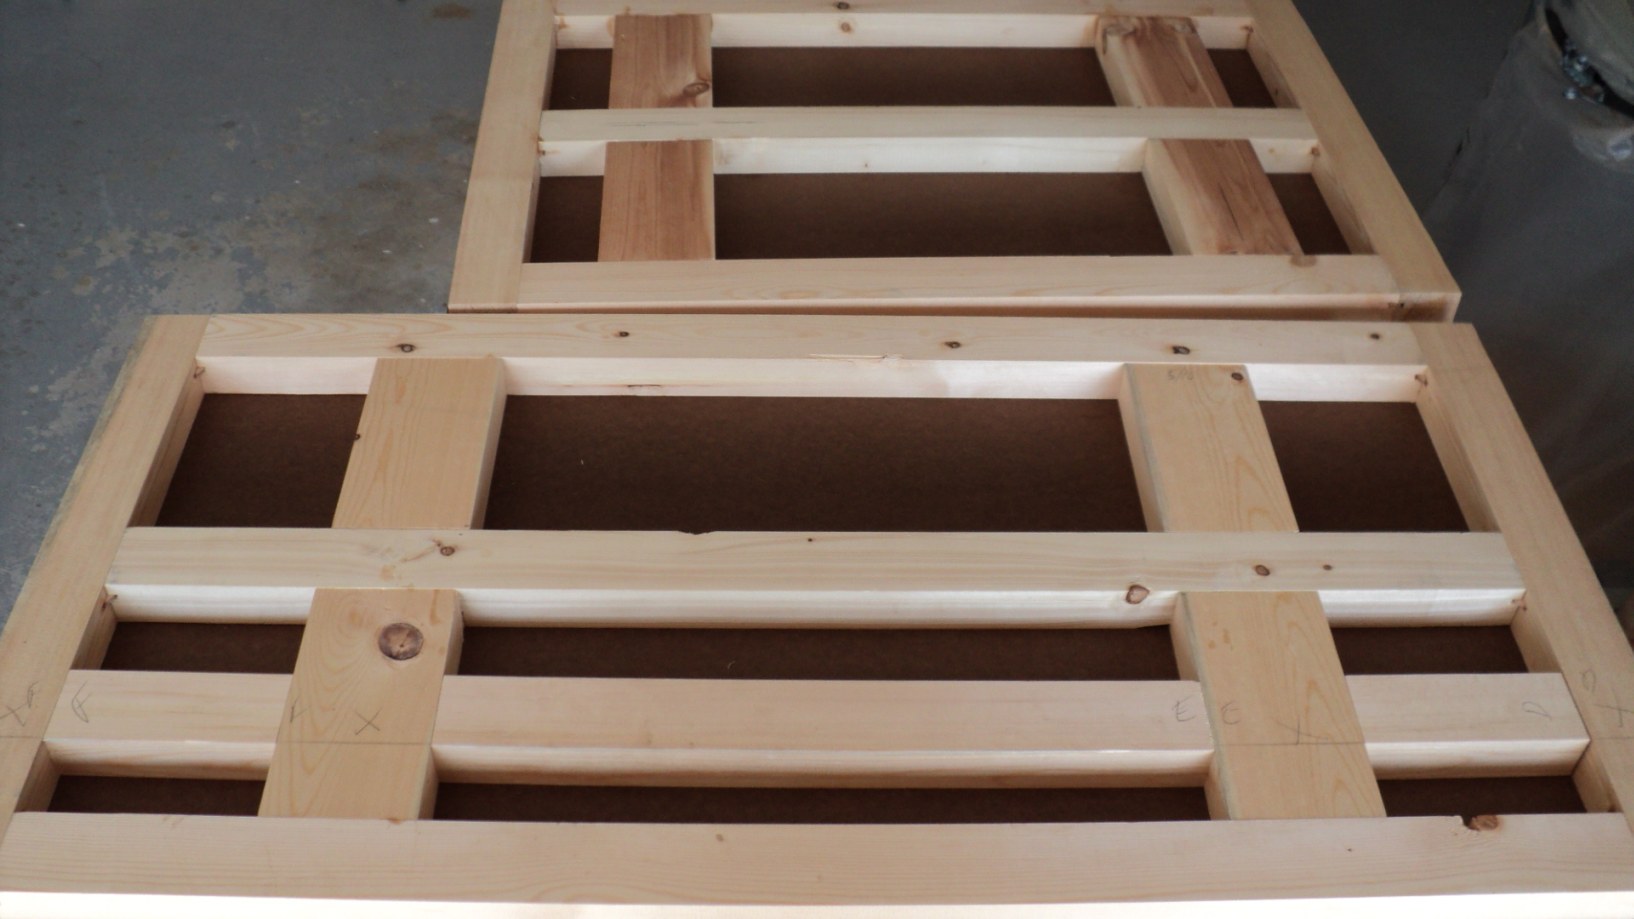
Having been inspired by the Mr. Sawdust design, and knowing the stability and accuracy of a torsion box, I had built my own version on an earlier restoration. I proceeded to employ the method once again, it having performed admirably, and even spawning a video about it's construction. All that the saw ever will be springs from the quality of the table build, robustness and accuracy allows one to not only make parallel slots and cheek cuts, but precision ripping and even resawing as shown in this video: Bahamas Shutters .
I simplified it's construction somewhat further, and also added blocking to mount the table's fence lock cam clamp angle rail. In the foreground is an 18" x 36" unit for the 1250 and 1400 models and at the same time I made an 18" x 28" version for an MBF I'm also restoring. Clad with 3/16" hardboard top and bottom it measures in at 1-1/2" thick and was trimmed square. After fabricating and applying the sacrificial top I then applied a coat of shellac, rubbed it out, and waxed the top surface of the tables Work now glides effortlessly across the surface yet doesn't shift during sawing, a testimony to the smooth cutting action of a well tuned saw.
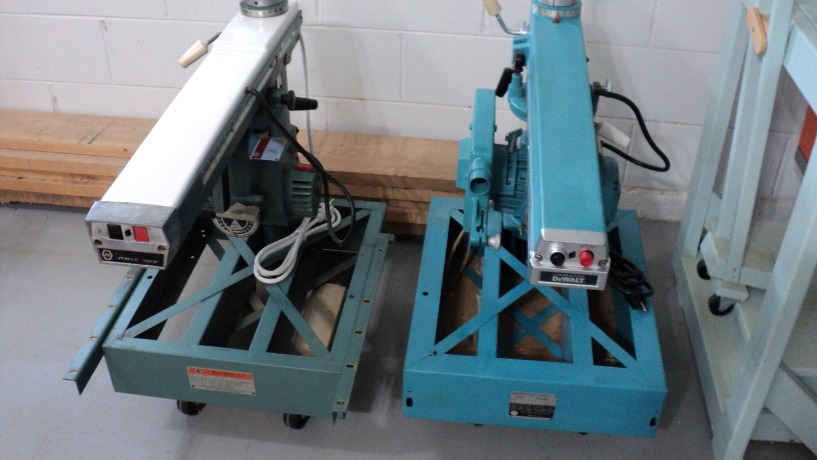
The babes, cleaned and reassembled, awaiting mounting to their base cabinets and calibration.
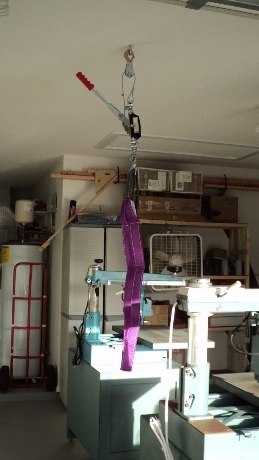
Being a one man shop means getting inventive about heavy lifting. The winch and sling were got from H.F. for under $30, money well spent.
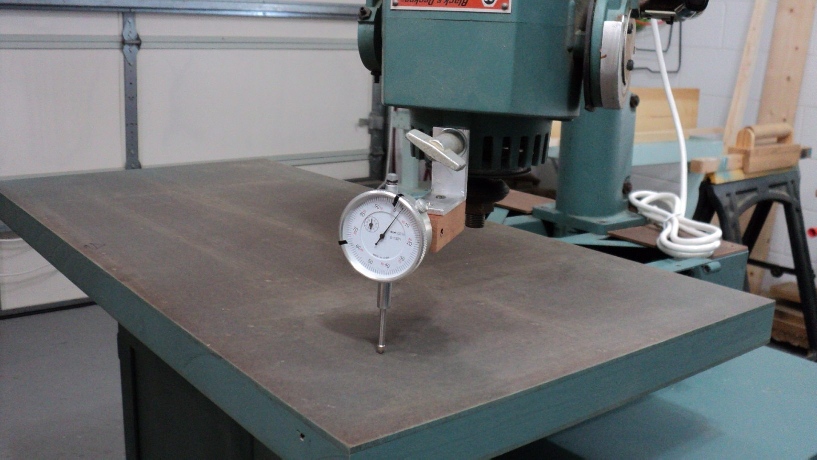
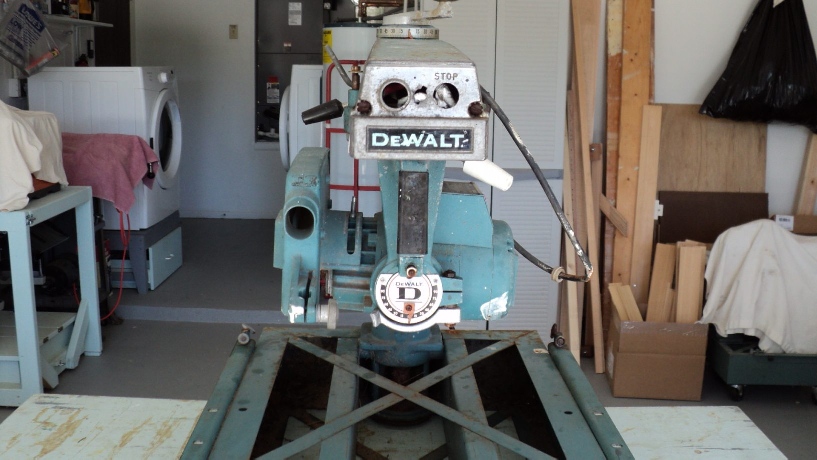
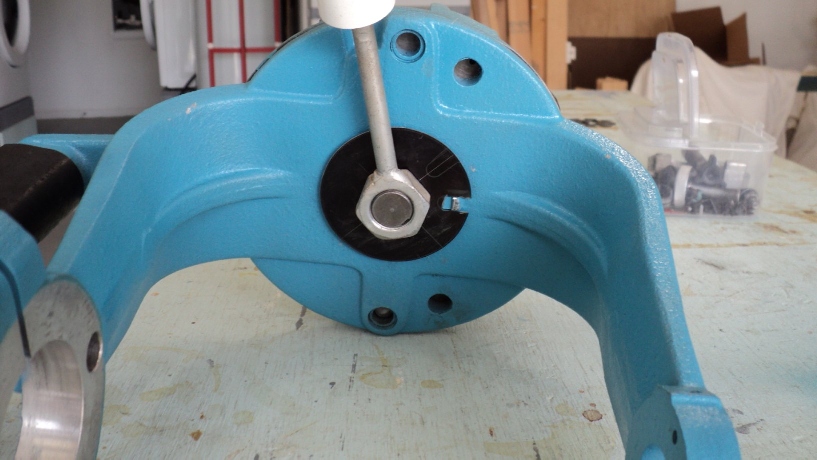
To insure flatness and accuracy, I made a simple "L" bracket mount for the motor blade guard stud to hold the dial indicator and constantly checked for level during assembly. Calibrating all the function stations went smoothly, only taking less than a 1/2 hour each machine. I had used a 9" multi- purpose plate for doing the checks and adjustments and found I like it better than using a sawblade, so it's part of my arsenal now too.
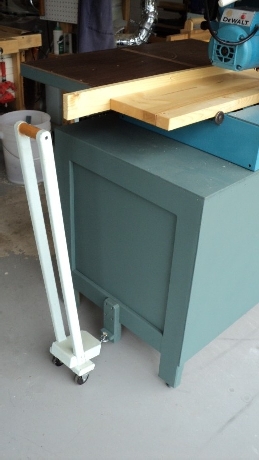
I wanted to use the Towbar system I developed for my Flip Top tool base, since the machines will only need to be moved occasionally; this is a perfect solution for portability and stability.
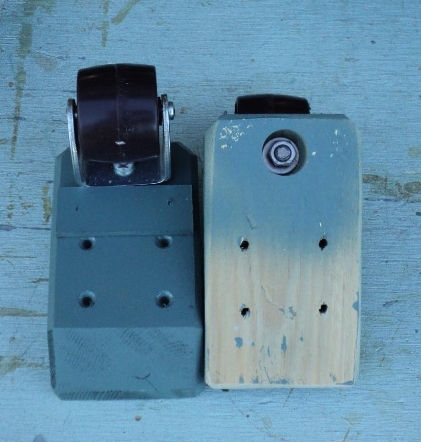
I picked up 4 bed casters at a thrift store for $.50 each, and threaded the shank for a 5/16" nut and washer combo. Counterboring the nut gives a flush fit to the cabinet leg, while a scrap of hardboard across the top of the caster frame gives anti- rotate service.
I leveled the base first, then attached the wheel assemblies a hairsbreadth shy of the floor. With just a slight pull back on the Towbar, the casters are engaged with the floor and I'm off.
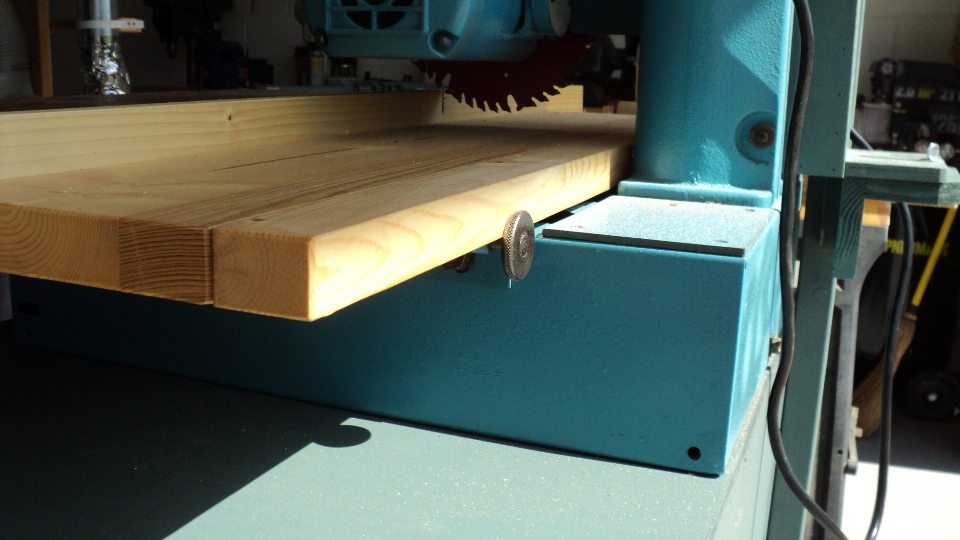
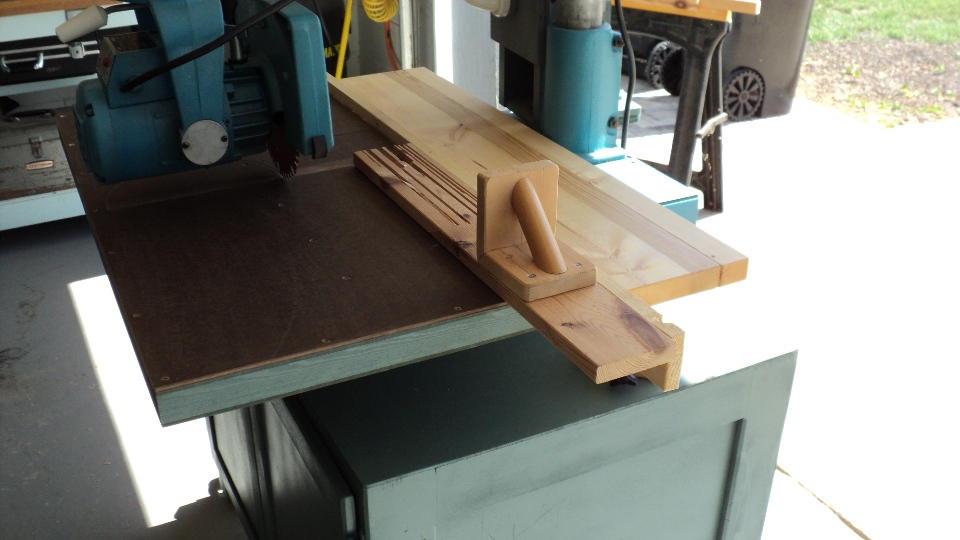
I planed down some 2 x stock to make two back boards, 1-3/4" wide and 6-1/2" wide to maximize the ripping potential of the saws. I wanted them beefier than the usual 3/4" MDF board most people use so I surfaced the stock down to 1-1/4" thick which still allows parking the blade neatly and safely behind the fence. Note the knurled adjustable stop clamping the board edge, this was a feature of the model R1450 which was provided with the "Up Front" cam clamping system, and having acquired two sets, I used them on both units.
Here is the front view of the actuating handles, totally adjustable for clamping pressure. It is fast and easy to unlock the fence and install jigs and fixtures or setup for maximum rip. Thumbscrews are just a medieval torture to me now that I'm spoiled. The wood blocking that was mentioned earlier in the table construction supports the handles' angle rail in front.
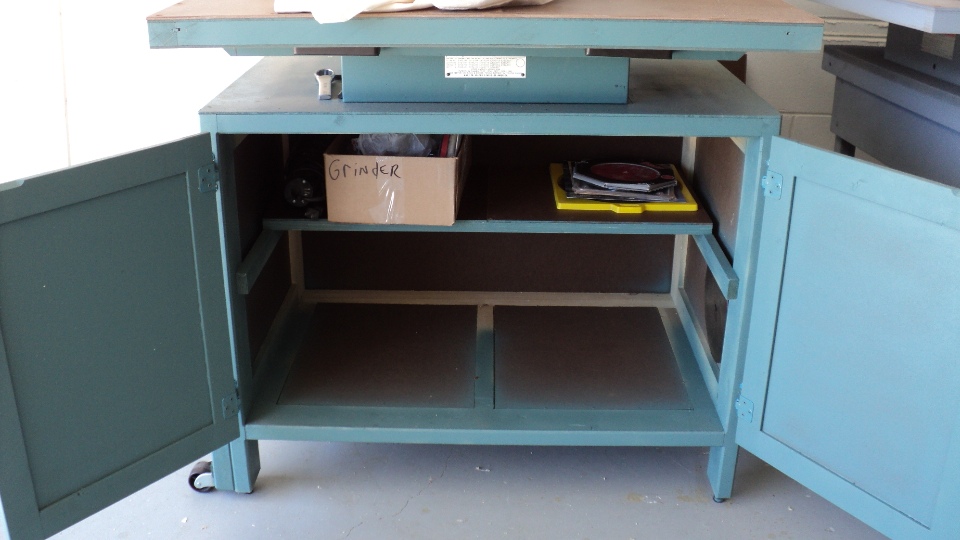
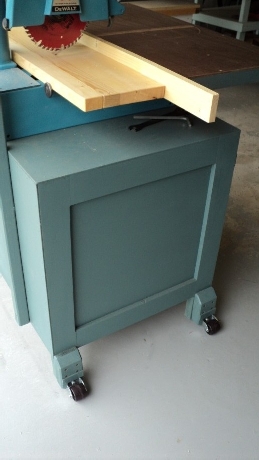
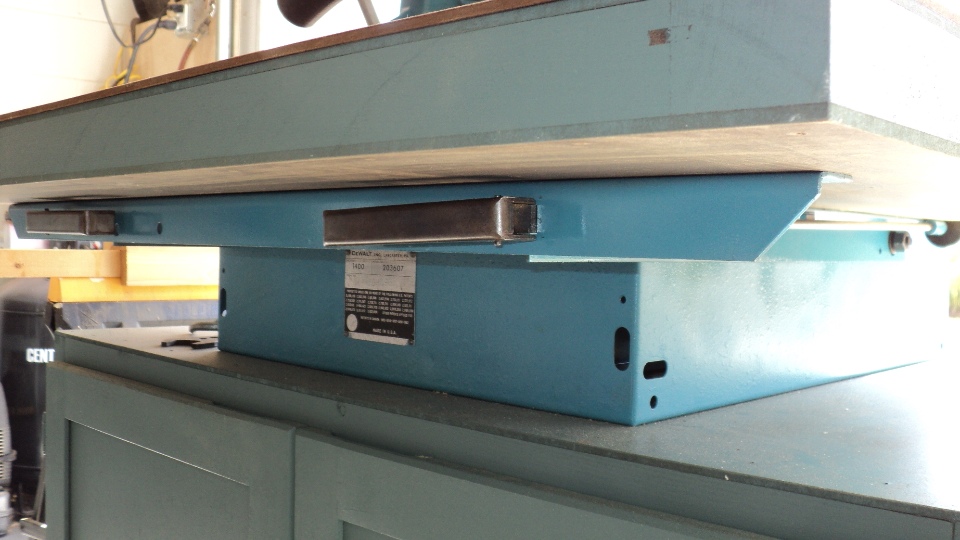
Since the footprint of the saw table top dictates the floor space required, I decided to make a full cabinet below, with a pair of doors enclosing a cavernous storage area 24" deep x 33" wide x 21" high. A 14" deep half- shelf adds to the versatility. Self- closing cabinet hinges were purchased at a thrift store for about $.10 each, and were repainted to match. Wanting stout construction, I used 2 x stock planed to 1-1/4" thick, mortise, tenon, and biscuit joinery completes the frame and panel cabinet.
A note on the color: I had custom mixed a quart of paint based on the Teal shade so popular on the 1960's saws. I like it a lot and the guy did a dead- on match to the sample I brought him.
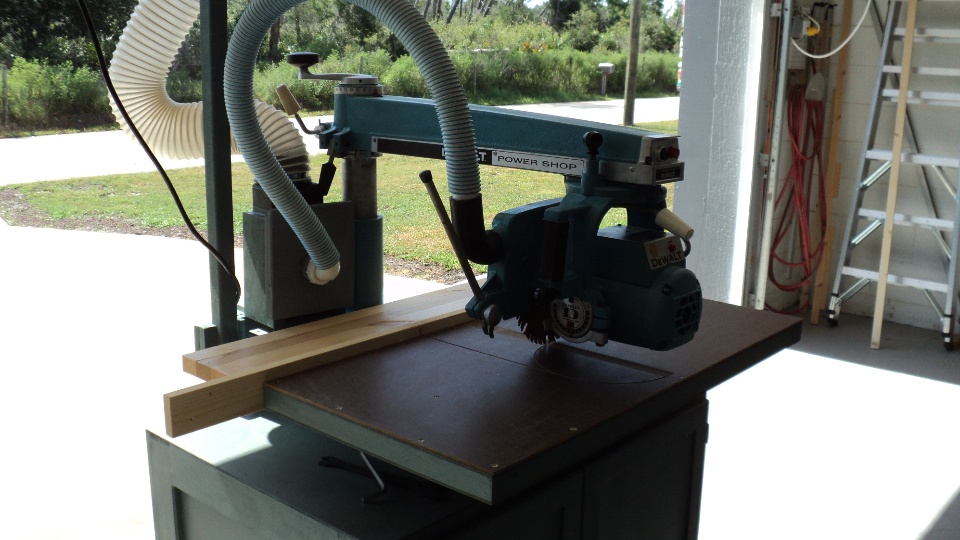
I picked up about 20 feet of 1-1/2" pool vacuum hose for $5.00 at a yard sale. It has a smooth inner wall and is flexible enough for this application.
A flanged pickup horn mounted directly behind the blade suffices for crosscuts quite well. Ripping, both in and out is effectively managed by a hose and adapter that slides over the horn's flange. When not in use, it hangs from the riser pole, close at hand.

Here it is shown sliding down into position.
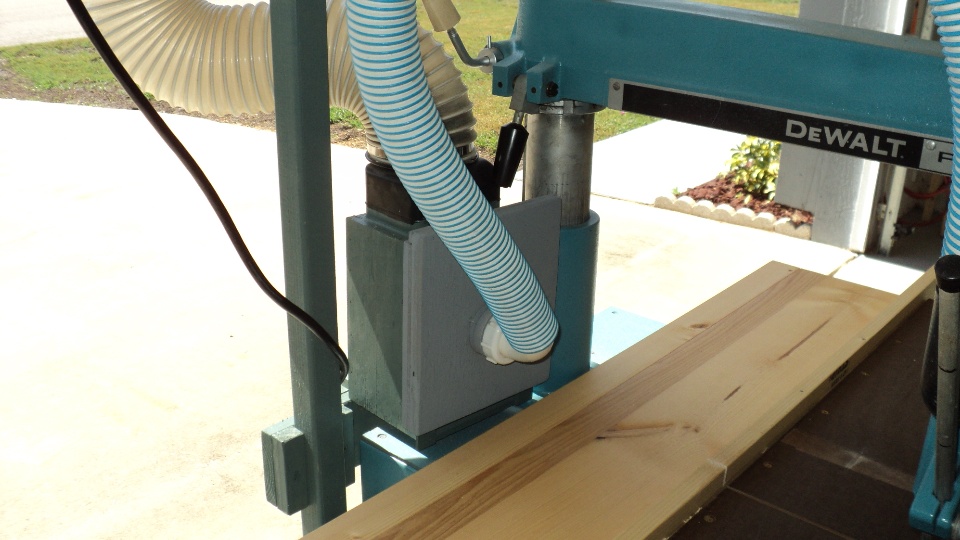
Fully seated, it sits about 3/4" proud of a total seal, airflow is needed for efficient debris movement, so this is an effective means of providing the volume needed with little loss of pickup suction.
A push block is essential for safe ripping, and I found by accident that if I use a long scrap board and mount my handle about 5" from the rear, a better sense of balance and control is realized, much like that found with a jointer plane.
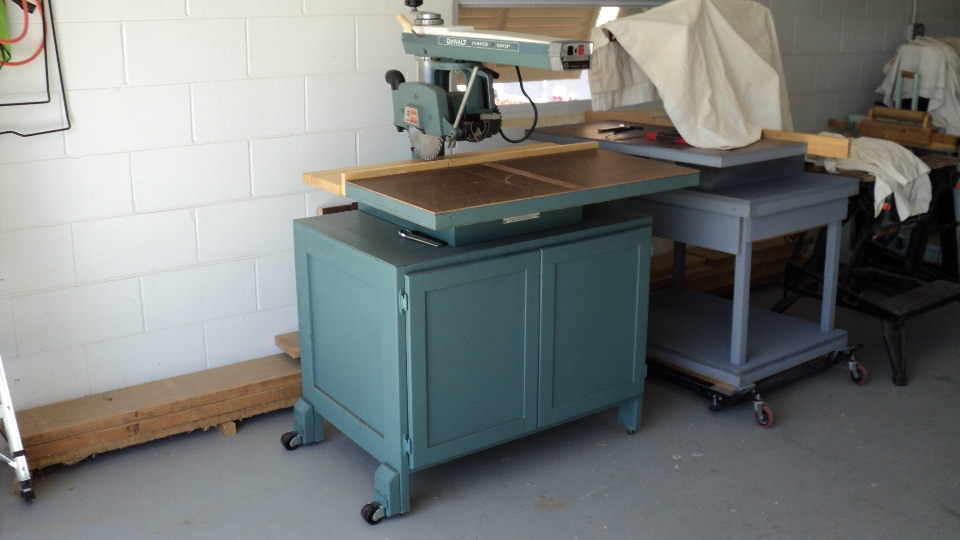
The 1250 rebuild was flawless and fast, but that was expected since it was in such pristine shape, so it was more of a lipstick job compared to the 1400. All stations are accurately calibrated and she's ready to provide backup service when my main player, the 1400, is tied up.

Here she is, my main squeeze, the 1400. What a difference from just a few months ago. When I rotate the carriage, I hear a most satisfying "thunk" as the index pin slams home with authority and declares "I'm ready, how about you?". It is tactile feedback like this that gives one the confidence to try and match it's accuracy with ones own precision.
The 1250 seems to be a forerunner of the 7740's that I
have seen. I was surprised to find the arm casting was made so as to accept the
up front elevation crank and miter latch/ clamp assemblies, I didn't know the
modification went that far back (1964), a full ten years before the 7740 model.
Although the 1250 swings only a 9" blade, the 7740 uses the same frame 350 motor
and swings a 10" blade, so they kinda played fast and loose with what they
touted as capacity. It doesn't really affect me anyway, since I use the Freud 8"
8300 series blade for 90% of my work and so the power reserve is more than ample
for me. The 1400 looks like it was an upper end consumer model, but still
identified as a "Powershop" brand. I'd have to give the quality of construction
edge to the 1400, with the solid cast arm vs. the "shroud" as DeWalt called the
plastic top open arm cap, and also they were still using the solid brass bar for
the column Gib slack take-up, instead of two brass screws which are on the 1250,
plus the frame 235 motor has a built- in brake vs. the 1250's manual one. Still
though, this made me reflect a bit on why we sometimes buy the old iron that we
do, and I suppose a romantic notion is as good a reason as any, after all why do
guys spend tens of thousands buying and restoring a 64 T-bird? In my case I
know exactly who and where I was when the '66 1250 saw was made: a single
guy working in a factory that made emergency lighting equipment. I earned enough
to buy my first car, a 63 Rambler
three-on-a-tree stick shift that me and my
buddies cruised for hours in. Just around the corner was the summer of love, and
the call of our country that we answered, just as our fathers had before
us. And like any coming of age story, we soon went on our separate ways in
life. I dont think Ill be letting this saw go anytime soon.
"DeWalt" Radial Arm Saw Forum , Until I found this group I thought I was the only one who had a special fondness for these old saws, a very valuable resource for the serious DeWalt user.
http://www.mrsawdust.com/ The undisputed professor Emeritus of the radial arm saw, especially DeWalts, is Wallace M. Kunkel, AKA "Mr. Sawdust". His book is considered the Bible among DeWalt users and his straightforward wisdom is essential to understanding the most efficient use of the tool.
http://joneakes.com/learning-curve/75-radial-arm-saws No less an ally of radial saw users is Jon Eakes, whose downloadable work "Fine Tuning Your Radial Arm Saw " is another valuable resource in getting the most accuracy from any popular R.A.S.
http://vintagemachinery.org/mfgindex/detail.aspx?id=252&tab=4 The Vintage Machinery Photo Index , a photo archive of DeWalt products.
This Web Page Created with PageBreeze
Free HTML Editor