Table dimensioning; for a specific posting, see the faq’s for more details.
Main table depth in front of the fence is 18” typically for a 10” blade, possibly more with larger blades. Back boards are split 6-3/4” and 2- ¼” for shaping and ripping. Widths (L-R) are up to 38” depending on need, less can be an asset in smaller shops.
Paul’s suggestion for finding dimensions of main table and back boards:
Ideally you want at least an inch beyond the full out rip position (main table). Set the blade at the zero mark for the in rip and that's the back edge of the table. Use a 3/4" fence and divide the back boards to be tight at 1/2 the thumb screws length.
…The width is still
48", and if I were doing it again, I think I would make it a bit shorter
(maybe not as short as 35" though!) It was pretty hard keeping 4 feet of
table flat during the glue up, and I have never really used the extra width
(actually, the extra width is great for collecting sawdust, cutoffs, extra
tools, and coffee cups.....everything that will get in your way during a
crucial cross-cut.)
Note: stock stands are very useful for supporting long material, thereby condensing the practical footprint of the machine to about 15 square feet or less.
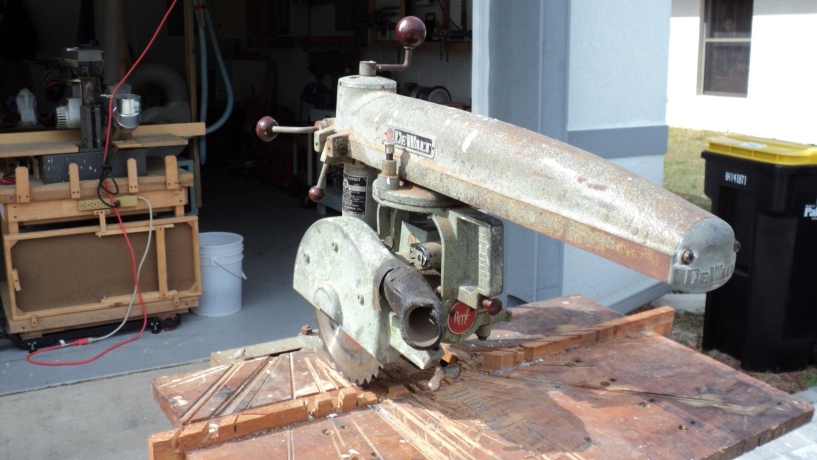
“The DeWalt uses 80% less working area compared to tablesaws.”
That is to say it’s footprint is just a fraction of what you’d need with a tablesaw; effectively the top dictates most of this measure.
Here are the
"original" table sizes for the DeWalts that I have:
-Submitted by Paul
Here is a table size you might add to your suggested replacements:
-Submitted by TMeyer014
(Note these units have a folding front table extension, nominally 5” in depth, thus making 18” total depth when swung up.)
The
Fence:
It is a loose piece and can be reversed to accomodate new kerf cuts. It can be made from any decent piece of stock, such as pine, poplar, maple, some even use M.D.F. Make it as long as the top is wide or longer still for extra crosscut stop capacity. Make it high enough so that when installed and clamped it rises above the main table surface and sacrificial top combination by ¾” high.
Have been discussed above, a two- piece set is the most desireable makeup, and their size may vary depending on the model of saw. Thickness should be such that they are less than the completed main table to allow swinging the motor behind the fence (miter positioning) without having to elevate it.
If you have the good fortune to acquire a saw with a hacked up but otherwise useable top, you may be able to revive it simply by capping it with a new surface. In the following images an MBF was subject to this quick fix which returned it to original usefulness:
And after the recap of 3/8" ply:

The solid maple top is as stout as ever, with new back boards and fence it’s ready to give long and accurate service once again.
A Mr. Sawdust table is one of the earliest designs meant to overcome the tendency of flexing and curving in a single sheet table construction. It is two layers of sheet goods laminated together with an embedded set of steel flats.
An alternative construction that utilized a simpler method than Sawdust was closer to a box or torsion beam construction presented in this video .
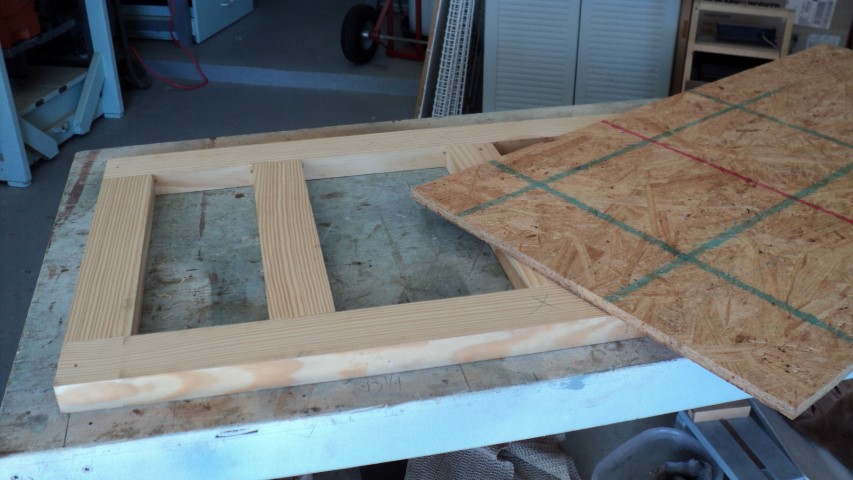
It has since been simplified further still so that now it is more accurately described as a grid/ frame construction. It is topped with a single piece of construction grade sheathing or ply, 3/8- 7/16" thick. The bottom or down side is left uncovered although there is certainly no harm in applying a matching piece to it.
Here the grid is constructed of common pine, surfaced to about 1-1/8" thick. The only critical factor is to ensure all components are exactly the same thickness. The stock width is about 2-1/2", and overall size is 18" x 36", with glue & biscuits used for assembly.
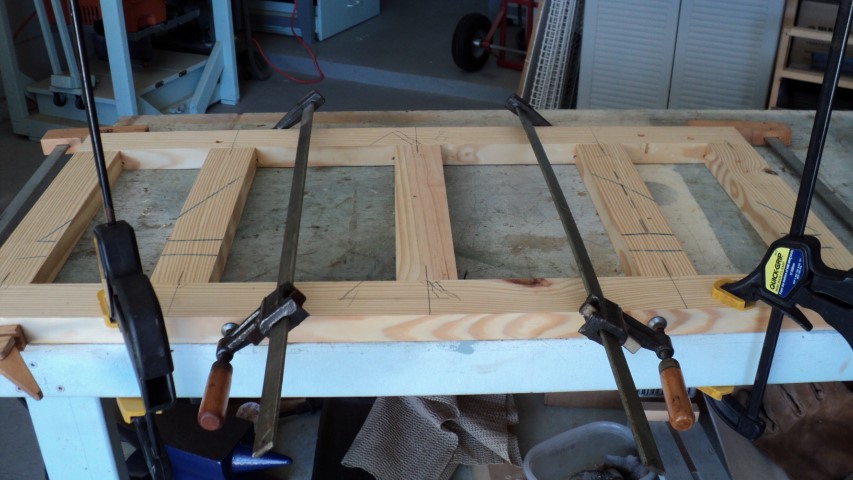
The stiles are positioned so that the two that straddle the center one align on center with the base angles. This side is the one that is most flush with all pieces, thanks to the biscuits.

The top cap is then applied in the conventional manner, using glue and screws or nails. The finished sub table is now ready for mounting to the saw and alignment operations can begin, when done the sacrificial top can be applied.
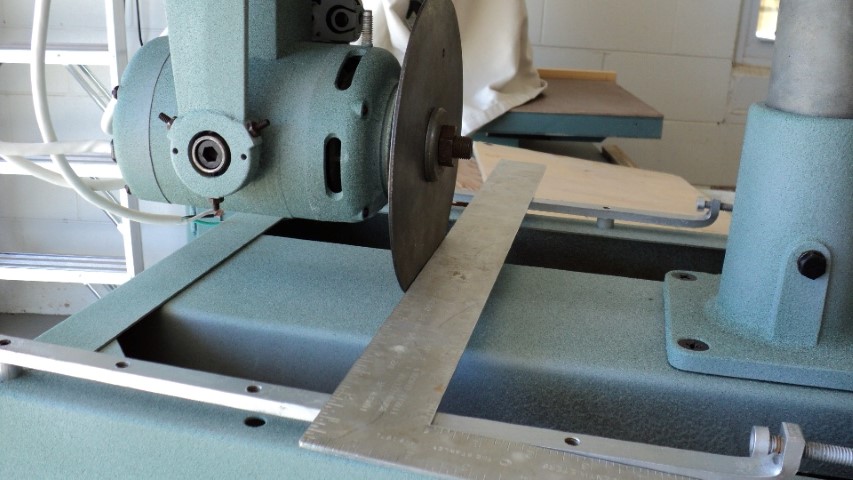
To position the table for mounting, the rear edge must align with the rear face of a sawblade while the head is positioned In-Rip, "0" on the scale. Center the table left and right and secure with fasteners.
It is perfectly acceptable to leave the table system unfinished at this point and put it to use, however cosmetic or moisture concerns may dictate paint, or other film- building substances be applied, this choice being left to the installer to decide.