Chrome Choke Knob Modification
The design of most aftermarket chrome choke knob covers will prevent the choke knob from seating all the way to a closed position. This can cause frustration during the tuning process by causing a rich condition. This is one way of solving the problem.
'
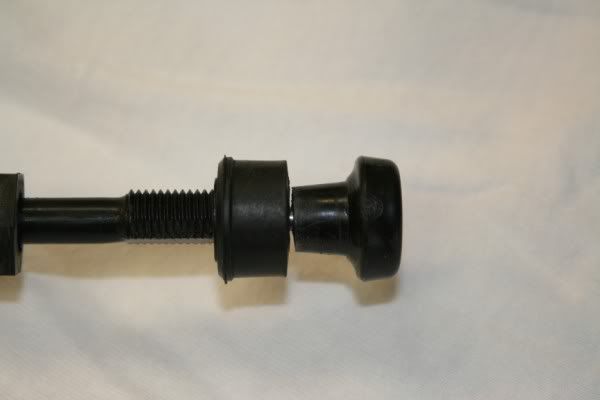
As has been discussed in the past, you may need to trim your factory choke knob to ensure it will seat all the way to the stop. The knob and stop bumper are soft rubber, and easily trimmed with any sharp blade. Here is a photo showing the choke knob fully seated after trimming. I had to trim about 1/8 off the knob to achieve this result. But, as you can tell, the knob is not touching the rubber stop, and the choke is fully seated. This is what you want!
'
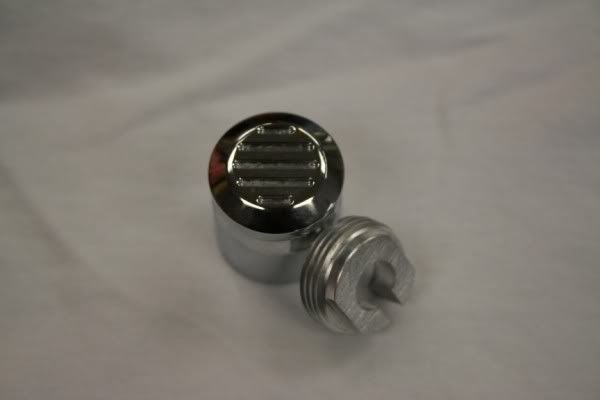
Below is the chrome knob and retainer nut. Most of the chrome choke knobs I have seen are designed with this type of retainer nut. The problem is the retainer nut doesnt allow the factory choke knob to be seated deeply enough inside the retainer to allow a flush fit between the factory choke knob and the chrome knob retainer.
'
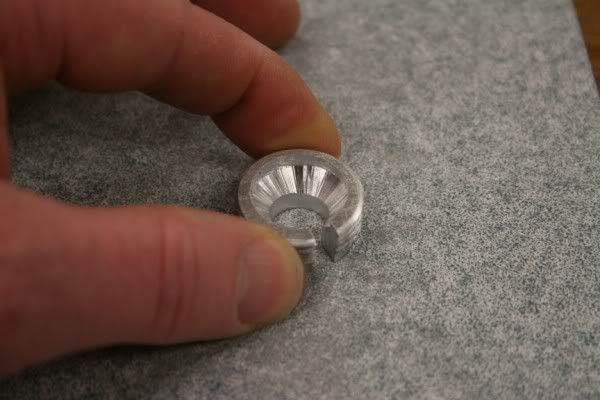
I decided the part of the retainer that seats against the factory knob needed to be not only recessed, but it needed a conical countersunk type of seat area to allow the taper on the knob to seat deeper inside the retainer nut for the chrome knob. This would allow the chrome knob to thread farther onto the retainer nut, and the goal was to achieve a flush, or near flush fit between the retainer and the factory choke knob. I used a carbide-tipped router bit designed for woodworking to machine the recess. This is a v-groove router bit, ¾ size. (my countersink bits are being borrowed by a friend, but any ¾ diameter countersink bit would work well too.) I chucked up the bit in the drill press and countersunk the retainer nut.
'
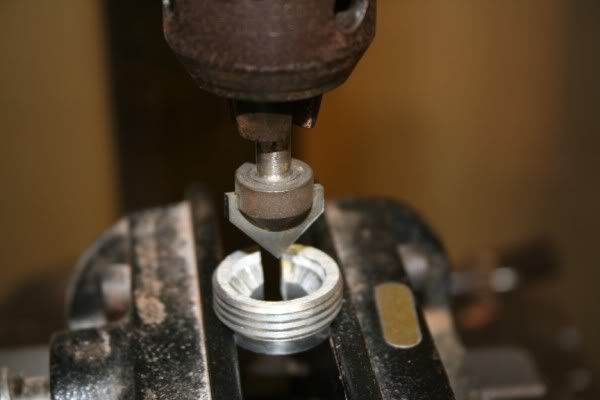
As you can see, the bit accomplished what was needed: About 1/8 of recess and a nice conical seating area for the flange of the factory knob to seat. This will allow the factory knob to be seated farther inside the retainer nut, to provide the flush, finished fit we need.
'

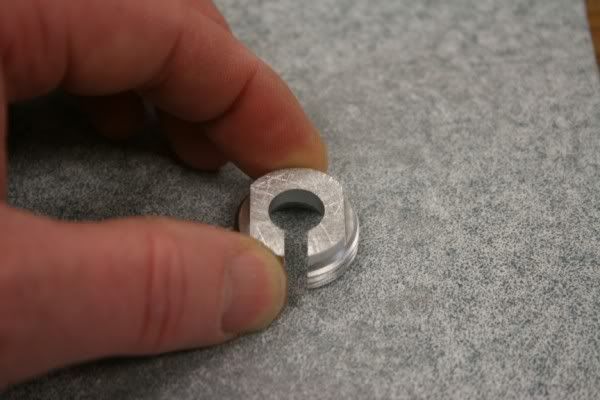
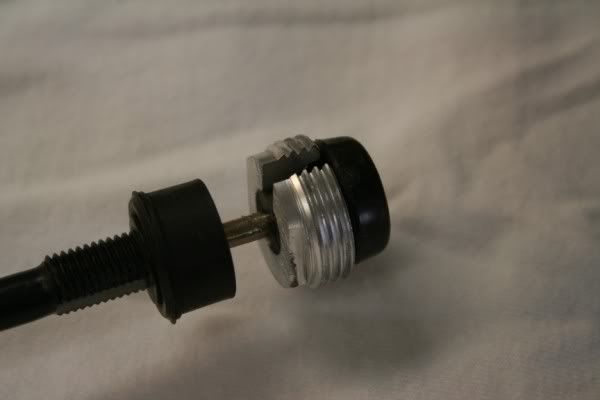
I then lapped both the threaded (inside) end and the outside end of the retainer nut to allow more clearance. The more clearance the better. The optimum fit would be for the factory knob to protrude out the bottom of the chrome knob retainer nut about 1/16 when the chrome knob is assemble onto the factory choke knob. (I used 80 grit sandpaper to lap these areas down. You dont need to remove much material at all, just about a playing card thickness or so.)
'
Then lap the other side.
'
With the machining and lapping done, it is time for assembly. Here you can see the retainer nut slid onto the factory choke knob. You can see the result of the countersunk recess: The retainer nut sits much further up the factory knob than before the machining. (The base of the factory knob is just about flush with the retainer nut. It will be even more so with the chrome knob is threaded on and tightened.)
'
Here it is all assembled. Notice how the retainer nut for the chrome knob is not even visible in this side shot? You can also see the base of the factory knob slightly protruding from the bottom of the chrome knob. I think this will do the trick!
'
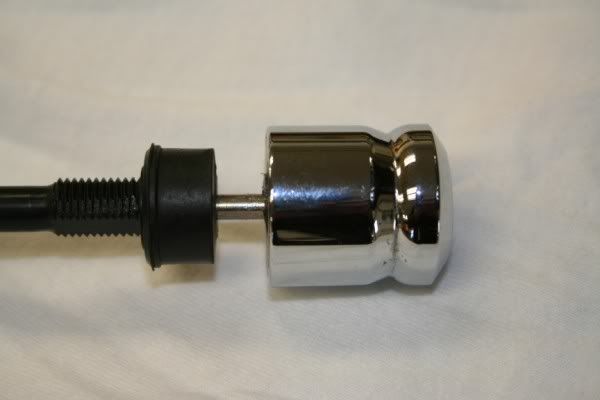
Here is the final result. The choke knob is depressed to the fully closed position. You can see the chrome choke knob, nor the retainer nut for the chrome knob, is interfering with the choke closure. In fact, you can see in this photo is identical to the first photo, but the choke knob is now CHROME! (And thats a GOOD thing!)
'

From start to finish, this process took about ½ hour to accomplish. Thanks for taking a look, and I hope this helps someone from going bonkers looking for a rich condition that is caused by the choke not closing completely!
'
Kevin (RidaV)